大事にしていた食器にヒビが!?それが特に思い出の品だった場合などには落胆が大きいですよね。
今回は、デフラグライフさんで紹介されていた「現代的金継ぎ」にチャレンジしたので、そのDIY一部始終を記録しておきます。

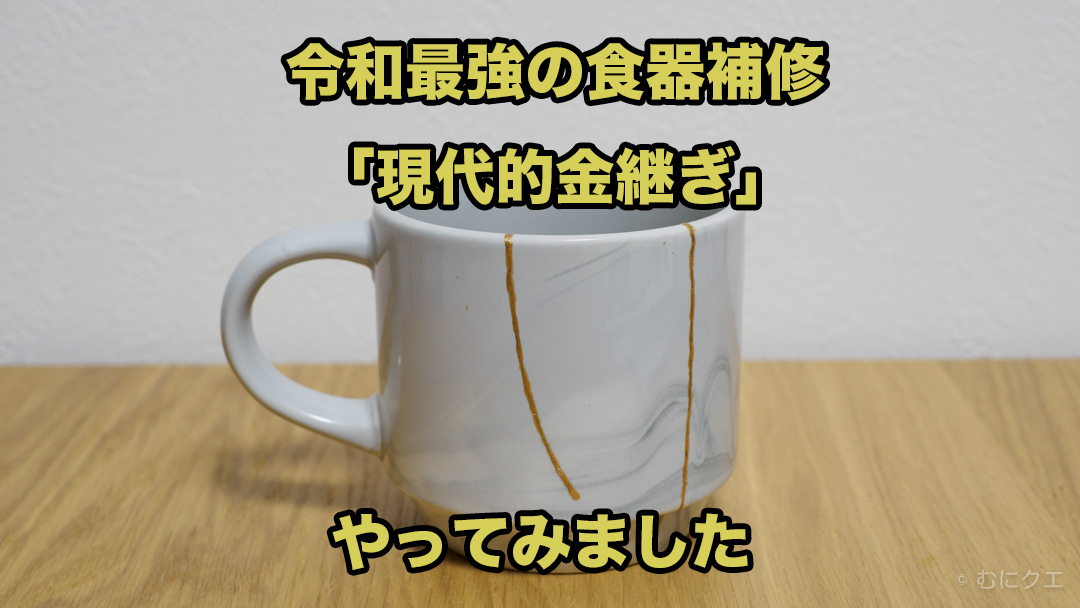
一般的な金継ぎと比較すると、とにかくお手軽、簡単な現代的金継ぎ。今回、完全に割れてしまってはいないが、ヒビが大きく入ってしまって使えなくなってしまった食器を、普段遣いの場に復帰させることができました。
さらに自分で修復したことによって、本当に世界に1つだけの自分だけの食器になりました。ずっと気に入っていたものだったら、さらに気分がアガっちゃいますね。特別な食器と特別なひとときを過ごす。これほど贅沢なことはない。
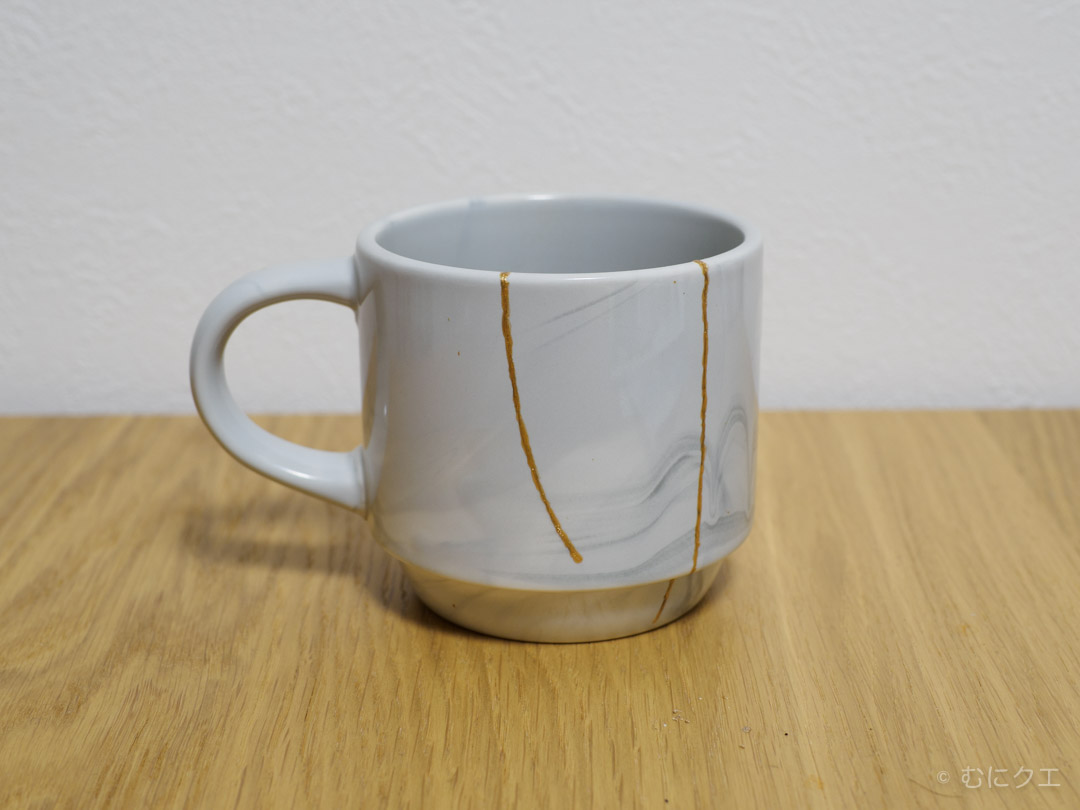
2014年に出雲のスタバで買ったマグにヒビが入ってきた
広島に出張に行ったときに、休日を挟んでいたのでどうせなら行ったことがない出雲に行ってみたいということで、レンタカーを借りて行ってみた思い出の出雲大社。
地元の人を誘って一緒に行ったら、出雲大社の中は怖いので写真撮影はやめた方がいい、などという謎の霊感が発動していたのを覚えています。彼は元気だろうか。
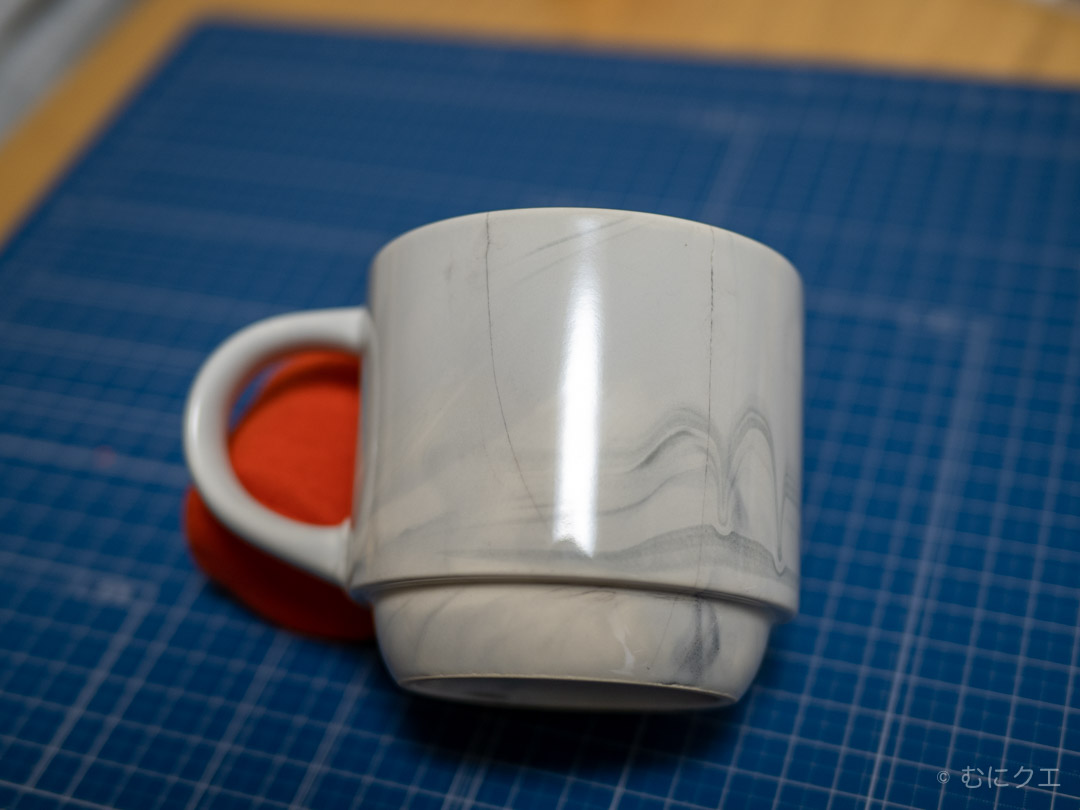
出雲大社の鳥居の斜向かいあたりにスターバックスがあって、そこでコーヒーと記念のマグカップを買ったんですよね。結構いい感じのおしゃれなマグカップで、グレー調なのでどんなシーンでも使えて、厚みもちょうどよくて、気に入っていました。
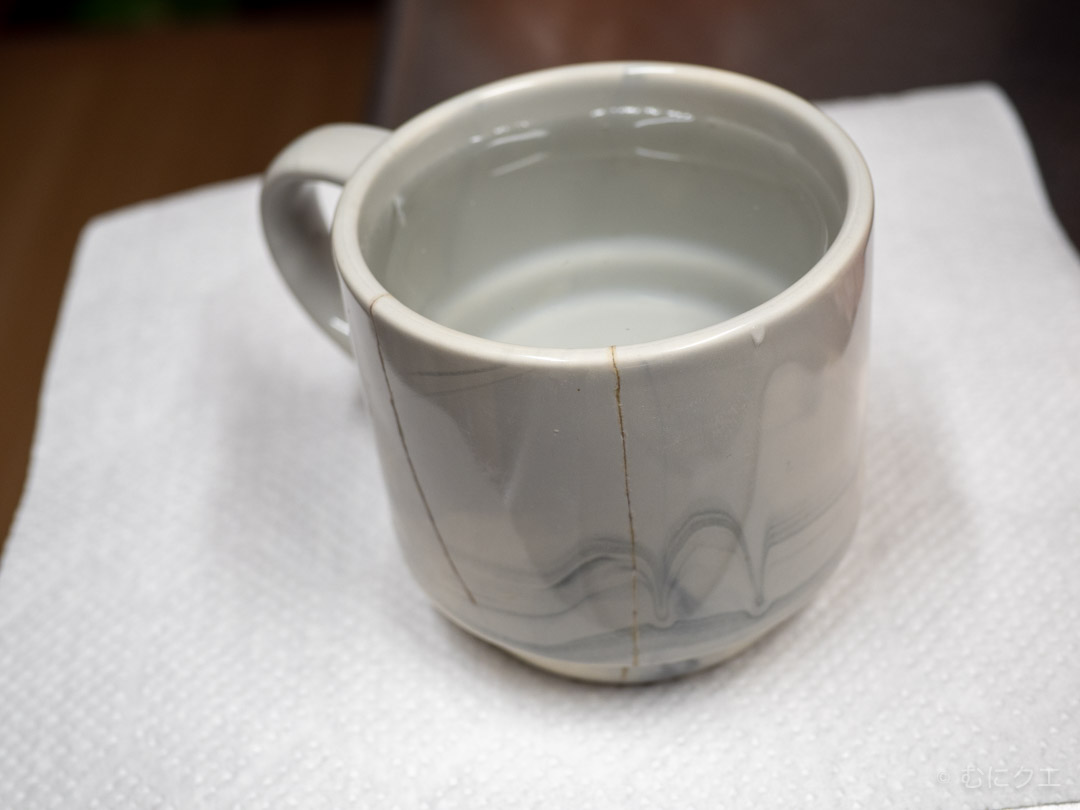
しかしある日。優雅なコーヒータイムを楽しんでいるとテーブルにコーヒーが滴っているではありませんか。なぜだ。原因は、マグカップのヒビ割れでした。
ヒビ割れを観た瞬間「あっ!これはカービィのスーパーデラックスでメガトンパンチを遊んで、中途半端な結果に終わったときのやつじゃん!」と思いつつ観察していると憎きを通り越して愛着が湧いてこなくもないのですが、このままではどうしても使えません。

捨てたくない。金継ぎをやってみたいので色々調べてみた
めちゃくちゃ気に入っているし、思い出深い品なので捨てたくない。このことパートナーに報告したら「モノは壊れるのは当然だ。新しいの買えばいいじゃん。」とのこと。なんという非情。モノの気持ちになって反省しろ。どうせモノに気持ちはないとか言うのだ。いや、それはそうなんだけど。つまり僕の気持ちなんですけど?
それはそうと、AmazonPrimeVideoでアメリカの比較的危なめなドラマを観たときに、「金継ぎ」がある施設での体験を経た個人の内面変化のアナロジーとして使われていたことを思い出しました。金継ぎは日本の伝統的な器の修復法で、漆と金を使ってもっと強く、もっと美しくなる、と。
「ナイン・パーフェクト・ストレンジャー」2話ラストあたりですね↓プライム・ビデオの会員の方ならいつでも観れます。サイコでヤバな内容でした。好き。

そこで、最近良く使っているDuckDuckGo先生で金継ぎのやり方について調べてみました。
どうやら普通の金継ぎでは電子レンジNGになるっぽい・・どうする?
伝統的な金継ぎでは、割れた面を漆で接着してその上に金箔をのせるようです。しかしこの方法はかなり困難で現実的ではないです。道具の入手、管理、費用等々、お手軽には行きません。
Amazonなどでキットが販売されていますが結構高価です。漆は皮膚がかぶれるので取り扱い注意ですし、粘膜についてしまうと大変です。


これは超余談ですが、漆を扱う男性の職人さんが、漆を使ったあとにトイレに行ったらもうそれは大変なことになったという話を直接本人から聞いたことがあります。あの人は元気だろうか。
話がそれましたが、さらにダメな点としては電子レンジNGになっちゃうというところでしょうか。ちょっと温め直したいというときに電子レンジが使えないのはかなり不便です。そこでさらに検索してみると、「現代的金継ぎ」という手法を考案され紹介しているブログにたどり着きました。
デフラグライフさんの「現代的金継ぎ」をマネしてみることに
ネットの海をさまよっていると「現代的金継ぎ」という手法で食器を直している神がいました。神は神社にも宇宙にもいない。ネット上にいるんだ。
「現代的金継ぎ」で検索してみると非常に多くの人がこの方法を試されている模様。これは真似するしかない。ということで材料を購入して試してみることに。
この「現代的金継ぎ」では、食品安全上問題ない材料を使うことで口に入ったときのリスクをなくしつつ、さらに伝統的金継ぎでは不可能な「電子レンジ」もOKになるというスゴイ方法。レンジOKはかなりデカいです。
※ペベオ ポーセレン150 アウトライナー ゴールドですが、コロナ禍で入手難になっているようです。僕はというとAmazonで注文してから1ヶ月位待ちました。2022年3月8日現在、在庫は復活しているようですので、必要な方はお早めに購入されることをおすすめします。 2023年6月現在は問題なく入手できるようになっていました。
※いろんな色を試したい人はこっちもいいかもです。今後に備えて僕も買っておきました。金が必ずしもマッチする食器とは限らないので。

失敗しないための生贄†サクリファイス† 100均の陶器
Seria先輩から生贄を召喚して墓地に入れます。いえヒビを入れます。とにかく同じような感じで試してみて大丈夫そうならやりましょうということです。割ってはいけないので非常に微妙な力加減で、ハンマーでコツ、コツンとヒビが入るまで叩き続けました。そう、カービィのメガトンパンチを思い出しながらね。
実はここが一番難しくて、新品の陶器に対して任意のヒビ割れを作るという作業はかなり難しいものだということがよくわかりました。最終的には、外周に補強用のテープを貼り、平タガネとハンマーを使って欠け部分をつくって、これを広げるような感じで叩いていくと、うまくヒビ割れを作る事ができました。参考にする人はいないかもしれませんが、もしそういう作業をしたい人は参考にしてくださると嬉しい。

まずはこいつで試してみます。ヒビの補修だけというのは例が見つからなかったので、接着剤をうまく流し込んで接着しつつ、きれいに直してあげたい。
テストはうまくいった
テストしたSeria先輩の陶器はこんな感じになりました。やや塗料の塗り方が雑なのは勘弁してください。水漏れなどもないし、普通に問題なさそう。

ホンバン!!
本番です。現代的金継ぎ、ヒビ割れ補修編。
デフラグライフさんの紹介されている方法は完全に壊れてしまったものをボンドでくっつけるという方法ですが、今回はヒビ割れだけの補修になるので、ヒビ割れの接着のため一部本格的な金継ぎの手法を応用しつつ、現代的金継ぎの方法で直していきます。
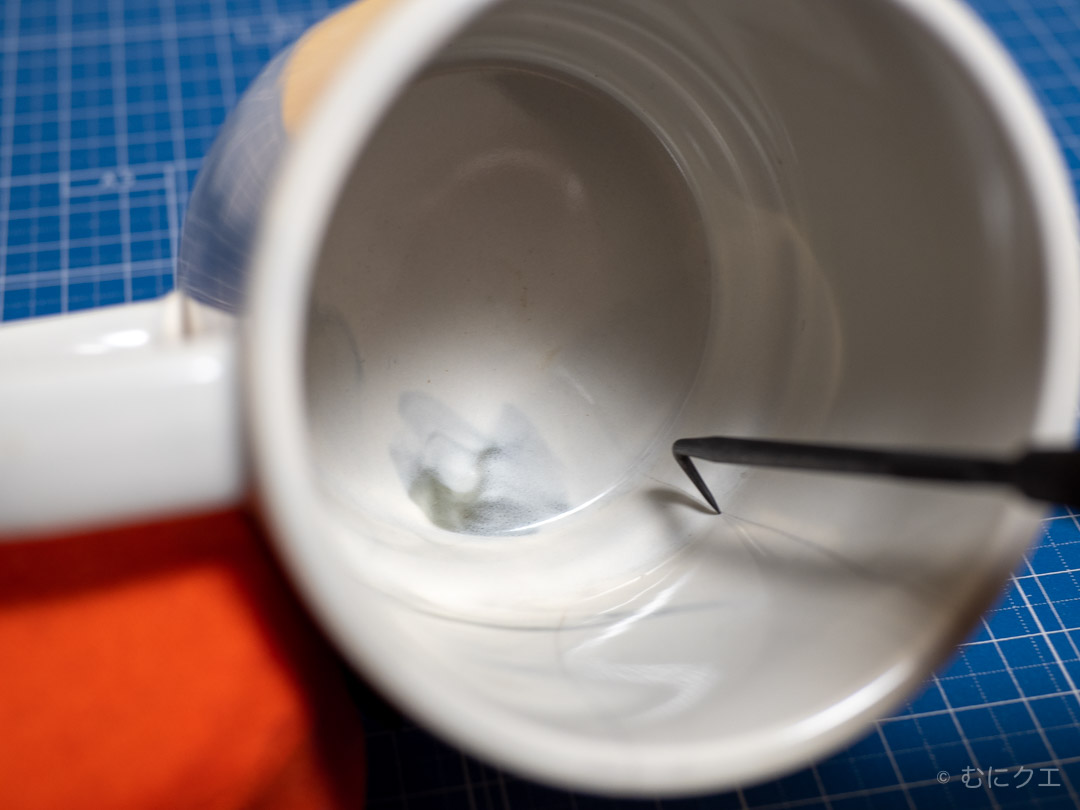
1. まずはシャープペンシルでヒビ割れを特定
完全に割れてしまったものは明らかに接着する部分がわかるのでいいのですが、ヒビ割れ品は目でよく見ても、ヒビがどこまで入っているのかちょっと分かりづらいことがあります。
そこで、まずはシャープペンシルの芯でヒビ割れ箇所をなぞっていき、全箇所を特定します。ちょうど鉛筆の粉がヒビ割れを黒くしてくれるので、該当箇所がわかりやすくなりますね。こんな感じです↓
2. ひび割れ箇所を「ケガキ棒」で少しだけ削る
ケガキ針を用意します。普通のもので大丈夫です。普通のもので大丈夫ですっていいましたが普通の人は持ってないと思うので、金物屋さんとかで入手してください。安いやつで十分です。Amazonとかモノタロウでも売ってます。

この棒で、ひび割れ箇所をなぞっていきます。そして少しだけ溝を彫ります。これは伝統的金継ぎでも実施される方法で、ひび割れ面をすこし広くして接着をよくするために必要な工程です。これでボンドが入り込む隙間を作っていきます。どうせタイトボンドで埋めるので思い切って削っちゃいましょう。
ケガキ棒じゃなくても、デザインナイフなんかでもできるかもしれません。ただマグカップのような深さのある食器ですと、先がL字になったケガキ棒のほうが作業しやすいはずです。
※ケガキ針やデザインナイフは先端が大変鋭利なものなので、取り扱いには十分注意してください。僕が使用したときは手袋とマスク、保護メガネをしました。ケガキ針そのものそうですが、陶器の粉が目に入ると大変なので。取り扱いが心配な人は、この工程はなくてもいいかもしれません。
3. 削った箇所にタイトボンドを乗せる
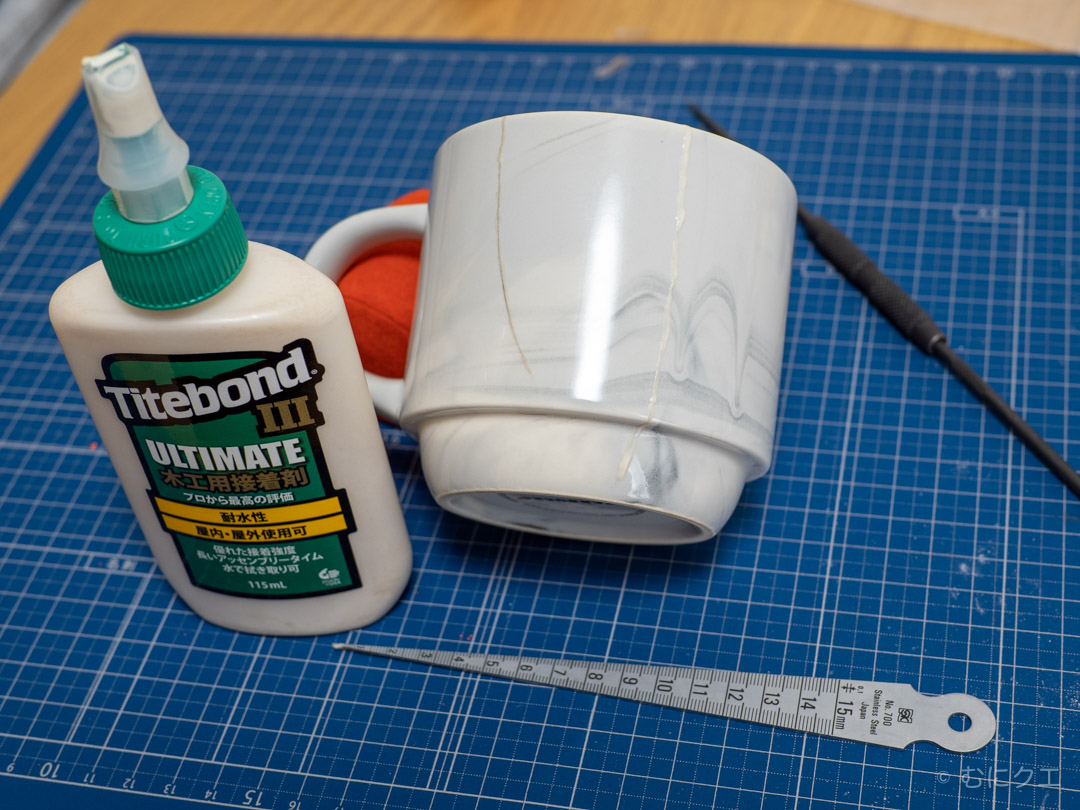
削った箇所にタイトボンドを乗せていきます。伝統的な金継ぎでは漆でやるところをタイトボンドで代用しています。つまようじなどの先端を使って、ちょんちょんと乗せていく感じでやるとキレイに仕上がると思います。
ただ、デフラグライフさんのほうでも記述のある通り、このボンドは結構粘り気があるので、もしかしたら隙間には入り込まないかもしれません。とりあえず、削り取った溝の部分が塞げればOKということにしました。
正直、ちゃんと入り込んでいるかは不明です。指で押し込んだりして気持ちの上ではちゃんと接着されていると思い込みましょう。あとで水を入れてみて、にじまなければOKだと思います。

4. 乾燥させる
タイトボンドは「オープンタイム」で接着面を7〜8分事前に乾かして、接着して「クローズドタイム」を本乾燥にするみたいなんですが、ひび割れ補修の場合そうもいかないので、塗りたくったらそのまま乾燥させます。
24時間以上乾燥させて、水が漏れてこなかったらOKです。
5. 金色の塗料を塗る
ペベオ ポーセレン150 アウトライナー ゴールドでボンドの部分に金色を乗せていきます。手軽なんですが、これが意外と難しい。これもキレイにやろうと思ったら筆とか爪楊枝の先端とかでやったほうがキレイに仕上がるかもしれません。
6. 塗料を乾燥させる
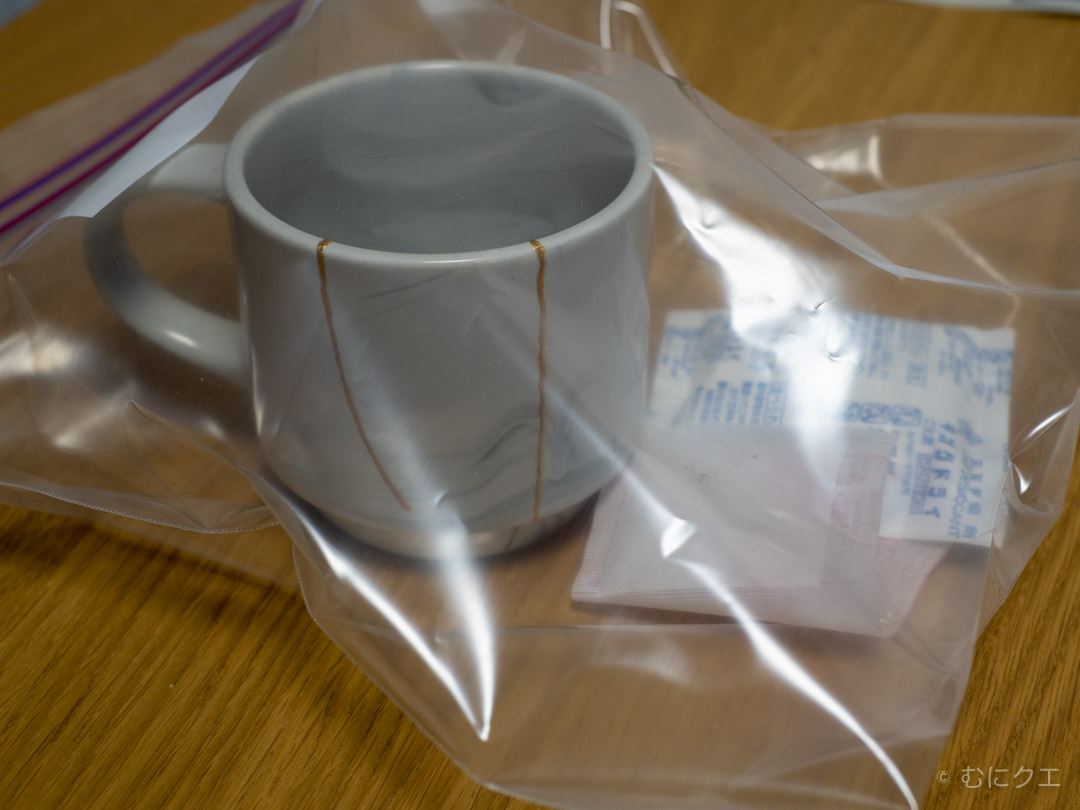
塗料を十分に乾燥させます。ペベオポーセレン150の説明書きによれば3〜5日とありますが、デフラグライフさんのほうで乾燥剤を入れて24時間以上で問題ないということでしたので、その方式を採用。念の為2日ほど置きました。
7. 塗料を焼成して定着させる
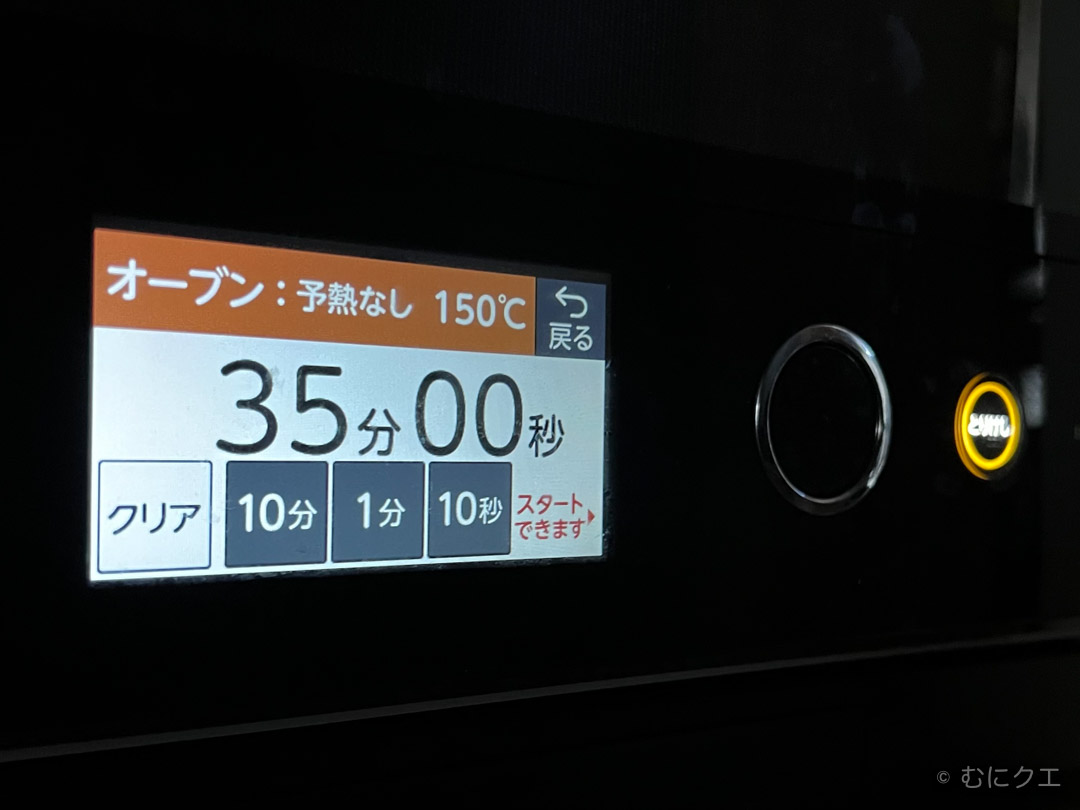
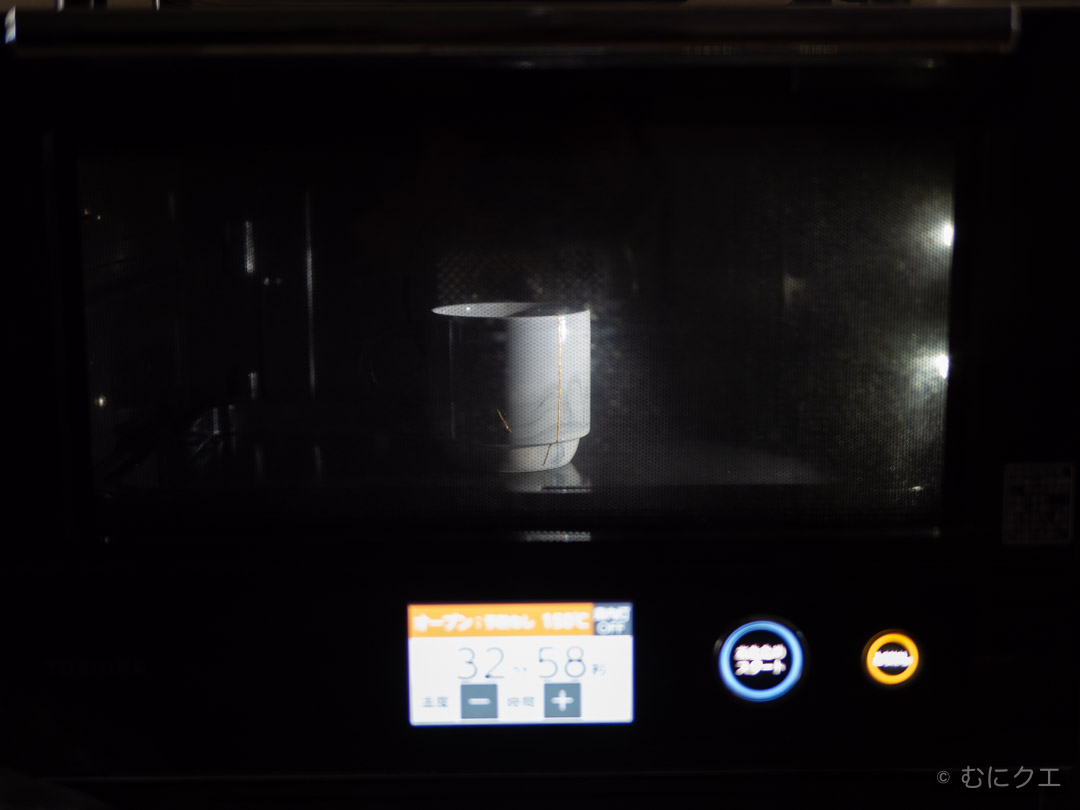
ペベオポーセレン150の説明書き通り、150度で35分オーブン焼成して、そのまま常温になるまでオーブンを開けずに待ちます。目安は2時間以上とのこと。(上述デフラグライフさんによる)
できあがり
できました!!わりといい感じになったのではないでしょうか。
しばらく使ってみて
できあがってから1週間ほど使ってみました。豆乳をレンチンしたり、熱いコーヒーを注いだり、普段どおりに。水漏れもなく、普通に以前のとおりに使える状態になりました。デフラグライフさん、ほんとうにありがとうございました。
作業をやってみて→ヒビ割れを補修するのはめんどくさいので、思い切って割ってしまったほうがいいかも
実際に作業をしてみての感想ですが、ヒビ割れのまま補修したいという気持ちが強い場合は上記の通りにやれば問題なく補修は完了します。
でも、ぶっちゃけヒビ割れ補修の方法よりも、ヒビが入ったら思い切って割ってしまって、デフラグライフさんに記述の方法で補修したほうが、簡単だと思いました。途中からそう思ってたんですが、ヒビ割れのままで補修するほうが気持ち的に良かったというのもあって、続けたんですけどね。
もう一つ付け加えるなら、もしかしたらヒビ割れ程度なら塗料を乗せるだけでも問題なく使えるのかもしれません。ただ、これは試してないのでなんとも言えないですが。
おわりに
以上が僕が試した現代的金継ぎです。かっこよくいうなら、モダン金継ぎとでもいいましょうか。単純に現代金継ぎといってもいいかも。
ちょっと接着や焼成などで時間はかかりますが、本物の漆による金継ぎに比べたらものすごく簡単でした。今後は陶器の色に応じて塗料を変えるなどいろいろ試してみたいと思います。
やってみて、いちばん大変だったのはテスト用の陶器にヒビを入れる作業でした。別にやらなくても良かったかもしれない。
それでは、ここまでお読みいただきありがとうございました。へば!
(追記:202303)陶器は「壊れたから買い直す」ではなく「壊れたら直す」の新習慣へ
この記事を書いてから1年以上経ちましたが、おかげさまで結構なアクセスがあります。読んでくださっている方、本当にありがとうございます。やっぱり僕と同じように、愛着のある食器がひび割れた、壊れたなどで悲しい気持ちになって、どうにかならないかと検索する方も多いようですね。
現代的金継ぎを試してからというもの、もともと壊れたものを直して使うのは好きな方だったんですが、陶器は買い直すのではなく「壊れたら直す」が新習慣になって、我が家では定着しています。
例えば次の画像の波佐見焼の陶器は、ふるさと納税でいただいてからすごく大事に使っていたものです。ある日、洗浄中にIKEAのダブルウォールグラスとぶつかって壊れてしまったんですね。とても悲しかった記憶があります。
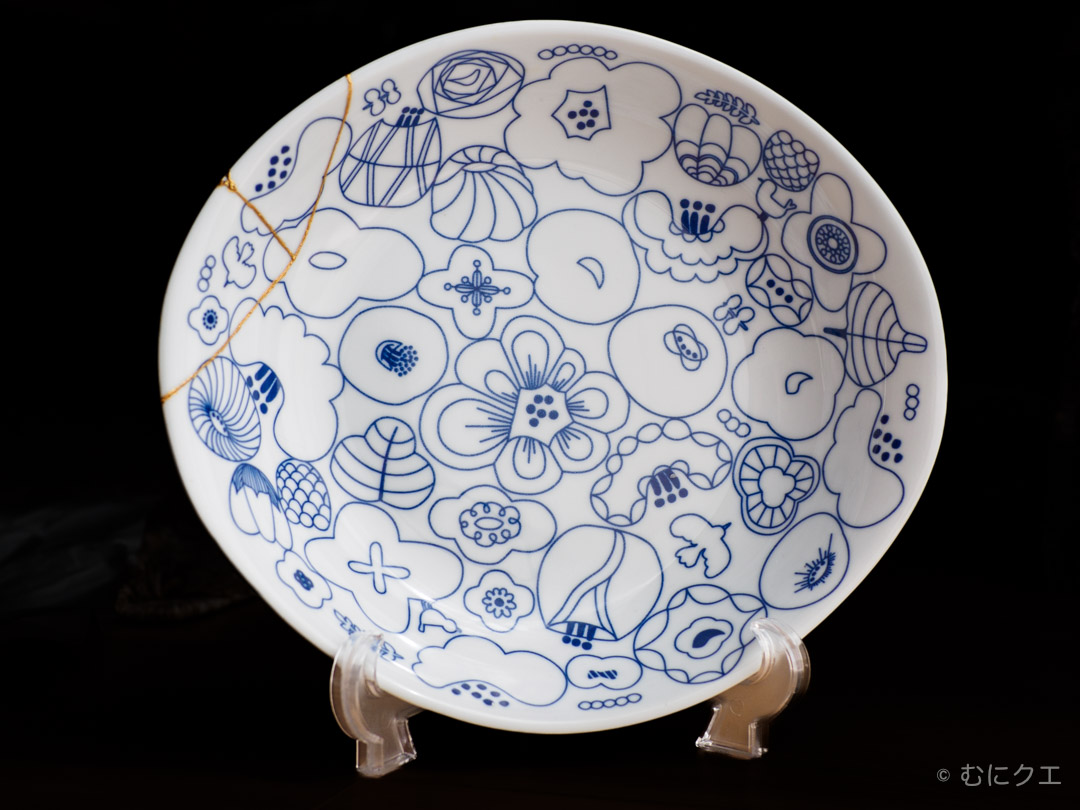
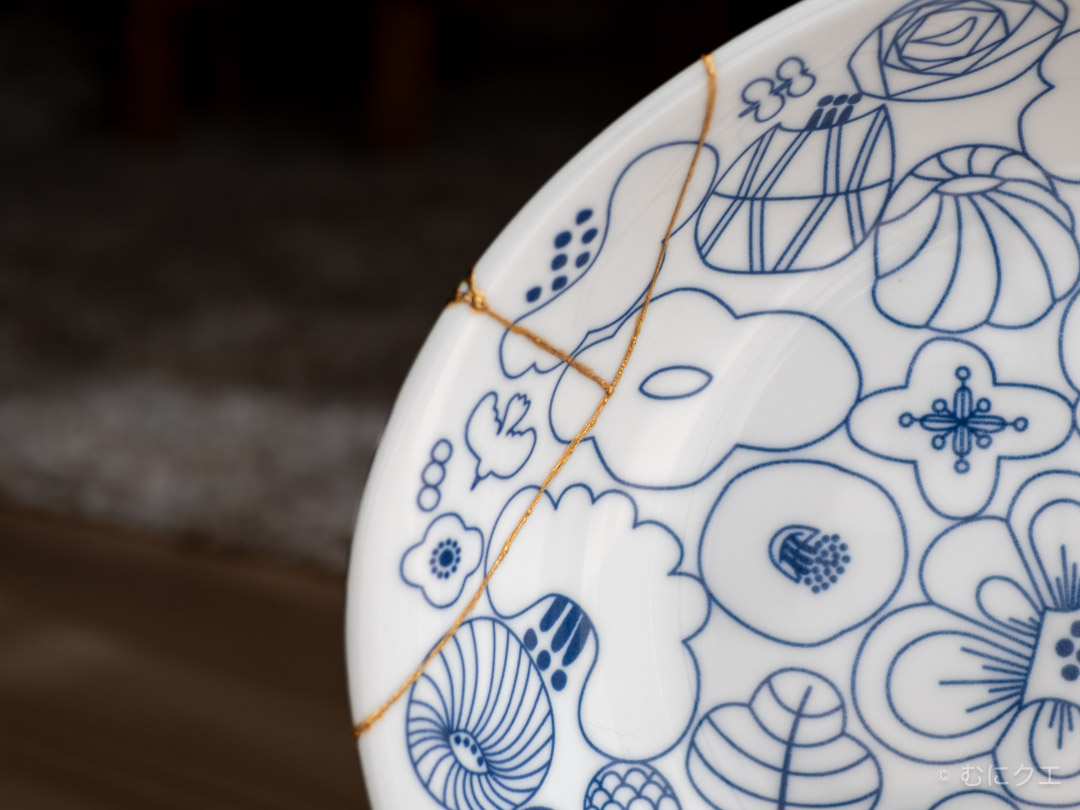
ただ、この金継ぎの方法を試していたこともあって、これはいい機会だし、割れたものを修復する方法で直してみようと思い、上記画像のように生まれ変わりました。これはこれで、困難を乗り越えた感が出て、より味が出て、愛着もさらに上がったように思います。いまだに我が家では現役で使われています。
一般的にいわれている本格的な金継ぎはハードルが高いが、こちらの現代的金継ぎは圧倒的にお手軽、簡単にチャレンジすることが出来ます。僕はいまのところ4つほど陶器を直して使っていますが、ぜんぶ成功していますし、使用上困難を感じることもありません。
そしてもちろん、普通の金継ぎと違って電子レンジでも使えるので、今までと使用感が変わらないにも関わらず、愛着だけが上がったというすごい技術です。本当にデフラグライフさんには感謝しても仕切れない程です。
これを読んでくださったみなさんにも、ぜひ陶器は「壊れたら直す」を新習慣にして、小さな愛情のあふれる日常を送ってほしいと思います。
それではまたどこかで!


コメント